
 English
- All
- Product Name
- Product Keyword
- Product Model
- Product Summary
- Product Description
- Multi Field Search
English Views: 0 Author: Site Editor Publish Time: 2026-08-24 Origin: Site


Does your appliance sound like a jet engine taking off in the laundry room? Disruptive shaking and loud mechanical noises demand immediate attention. You must address these symptoms quickly to prevent catastrophic appliance failure. Many homeowners instinctively blame the powertrain when their washer vibrates violently. However, resolving the issue requires careful troubleshooting. You must systematically isolate drive components from suspension rods and tub bearings. Guessing which part failed often leads to wasted money and unresolved banging. This technical diagnostic framework will help you confidently isolate a failing washing machine motor from other moving parts. We cover how to identify specific mechanical failures and evaluate replacement viability safely. You will learn the exact steps to troubleshoot. We also detail how to match specifications for components like a 180W Wash Motor, helping you determine the most effective path to repair your appliance.
Technicians rarely guess when fixing loud appliances. They use systematic isolation techniques. You can apply these same methods at home. Misdiagnosing a noisy washer costs time and money. It often leads users to buy unnecessary replacement parts.
Industry professionals rely on the belt drop test. This method isolates the powertrain from the drum. First, unplug the appliance. Access the back or bottom panel. Locate the drive belt connecting the motor pulley to the drum pulley. Slip this belt off carefully. Next, plug the machine back in. Run a standard spin cycle. Listen closely to the appliance. Does it run quietly now? If yes, your drum bearings or suspension likely failed. Does the loud noise persist? The issue lies directly within your powertrain assembly. This simple step saves you from buying the wrong components.
Different failures produce distinct sounds. You can often identify the broken part just by listening.
Violent shaking rarely stems from the powertrain itself. Unbalanced loads cause most aggressive vibrations. Always check your laundry distribution first. Next, inspect the suspension springs. Look closely at the shock absorbers. If you push down on the inner tub and it bounces repeatedly, the suspension failed. A healthy suspension dampens movement instantly. Do not replace the washing machine motor until you rule out broken shock absorbers.
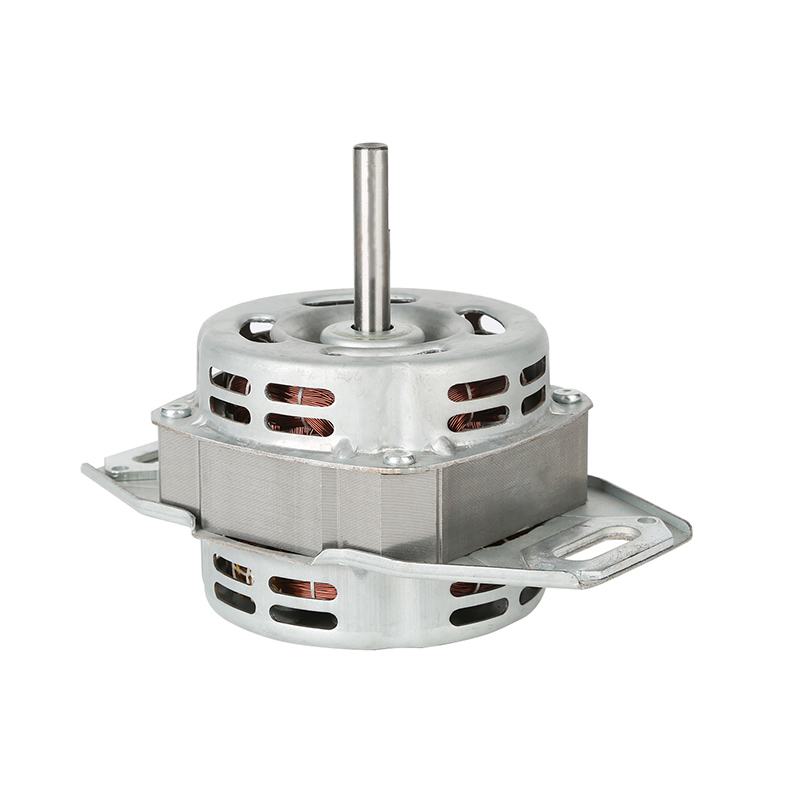
Understanding what physically breaks helps you plan your repair. Powertrains endure immense stress. They operate in damp, high-torque environments. Several specific components degrade predictably over time.
Internal bearings support the spinning shaft. They endure heavy loads during high-speed spin cycles. Long-term exposure to moisture causes them to rust. Overloading the drum forces them to handle excessive friction. Eventually, these bearings seize completely. A seized bearing creates terrible grinding noises. It forces the control board to draw excessive current. This overcurrent often triggers error codes on modern appliances.
Many traditional front-loaders use brushed universal motors. Carbon brushes conduct electricity to the spinning armature. They have a finite operational lifespan. Friction slowly wears the carbon down. Eventually, the brush wears down to its metal tension spring. This bare metal scores the delicate copper commutator. It creates terrible screeching noises. It causes poor spin performance. It even poses a potential fire hazard from excessive sparking.
Newer direct-drive systems eliminate belts entirely. They mount a stator and rotor directly to the drum shaft. These systems run incredibly quietly when healthy. However, they suffer from unique mechanical failures. The rotor contains powerful magnets. High-speed vibrations sometimes crack these magnets. The central rotor nut can also loosen over time. A loose rotor clatters violently against the stator during the spin cycle. This sounds like a jackhammer inside your laundry room.
Manufacturers use rubber isolation mounts to secure the powertrain. These mounts absorb natural operational vibrations. Rubber degrades over time. Exposure to ozone, heat, and moisture accelerates this degradation. The rubber becomes brittle and cracks. Once the mounts fail, the assembly shifts out of alignment. It transfers raw mechanical vibration directly to the washer chassis. Replacing these inexpensive rubber mounts often solves severe shaking issues.
Finding the exact replacement part requires careful research. You must match specific electrical and physical parameters. Installing an incompatible unit creates immediate safety hazards.
Original Equipment Manufacturer (OEM) parts guarantee exact fitment. They undergo rigorous quality control testing. OEM parts usually include reliable warranties. However, they cost significantly more. Third-party aftermarket alternatives offer attractive discounts. Some aftermarket units perform reliably. Others use inferior copper winding or cheap bearings. We recommend OEM parts for main drive components. The longevity and safety benefits justify the higher initial purchase price.
You cannot swap powertrains blindly. You must understand key electrical metrics. Always verify wattage, RPM, voltage, and shaft length. Consider a specific contextual example. Many compact, portable, or twin-tub semi-automatic washers utilize a 180W Wash Motor. You cannot replace this unit with a 250W version. A higher wattage unit draws more current. It can instantly fry the delicate control board. The mounting bracket style must also match exactly. A mismatched 180W Wash Motor will not bolt securely to the chassis. This causes immediate housing incompatibility. Always buy the precise wattage variant listed on the factory chassis plate.
Older universal motors remain incredibly cheap to fix. You can usually restore them by installing ten-dollar carbon brushes. Modern appliances feature advanced inverter or direct-drive systems. Inverter technology offers superior energy efficiency. It runs much quieter than older brushed designs. However, repairing them proves difficult. Component-level repair is rarely possible on inverter units. When they fail, you usually must buy a completely new assembly.
Replacement Strategy Comparison Guide
| System Type | Common Failure Point | Repair Difficulty | Typical Resolution |
|---|---|---|---|
| Universal (Brushed) | Worn carbon brushes | Moderate | Replace carbon brushes only |
| Direct Drive | Cracked magnets / loose nut | Low to Moderate | Tighten nut or replace rotor |
| Inverter Assembly | Control board / burned windings | High | Replace entire motorized unit |
| Twin-Tub Component | Burned winding / water damage | Moderate | Replace exact wattage unit |
Replacing major appliance components requires respect for electricity. It also demands precise mechanical alignment. Do not attempt this repair unless you feel confident handling heavy tools.
Appliance repair carries severe electrical shock risks. Unplugging the machine does not eliminate all danger. You must manually discharge the start capacitor. Capacitors store lethal amounts of energy long after unplugging. Use an insulated screwdriver to bridge the capacitor terminals safely. Always verify grounded connections during reassembly. A loose ground wire creates a severe electrocution hazard if water leaks.
You need standard hand tools to complete this job properly.
Installing the new unit presents distinct physical challenges. You must realign the drive belt perfectly. Improper tensioning destroys internal bearings rapidly. If you pull the belt too tight, it places immense side-load stress on the shaft. This ruins your brand-new replacement within months. Splined shafts on direct-drive units require exact seating. Never force a rotor onto a splined shaft. You will strip the delicate metal grooves instantly.
Appliance repair decisions often feel overwhelming. You need a logical framework to guide your choice. Evaluating the lifecycle of your machine prevents bad investments.
Industry professionals rely on the seven-year rule. Major household appliances usually hit an inflection point between seven and ten years. If your washer is older than seven years, pause before buying expensive parts. Evaluate the holistic health of the machine. Check the main motherboard. Inspect the main tub seal for leaks. Look for heavy rust on the frame. Fixing a powertrain makes no sense if the tub bearings are already grinding.
Calculate the total repair estimate objectively. Add the cost of the replacement part. Include any service labor if hiring a professional. Compare this total to the retail price of a comparable new machine. If the repair exceeds 50% of the replacement price, stop. Statistically, buying a new appliance is highly recommended at this threshold.
Follow this structured sequence to resolve your noisy appliance safely:
Diagnosing an excessively noisy appliance requires systematic elimination. You cannot rely on guesswork when dealing with heavy machinery. Always perform the isolation test before purchasing parts. Replacing a washing machine motor restores factory functionality. It significantly extends the usable lifespan of your appliance. However, this decision must remain grounded in accurate symptom matching. You must adhere strictly to all electrical safety protocols. Take your time, verify your specifications precisely, and prioritize safe installation practices above all else.
A: This specific symptom often points to an inability to reach optimal spin RPM. The powertrain might lack the torque needed due to failing components. It also strongly indicates a worn clutch assembly or severe drive belt slippage. The machine physically cannot spin fast enough to extract water.
A: No. Manufacturers use sealed bearings inside these assemblies. You cannot access the internal ball bearings to apply grease. Spraying external lubrication is a temporary, highly ineffective patch. It only attracts dust and lint. Once a sealed bearing begins grinding, complete replacement remains the only safe solution.
A: Absolutely not. Violent vibration usually stems from external factors. Always check your leveling legs first. Ensure the shipping transit bolts were removed from new machines. Broken suspension rods and unbalanced laundry loads represent the primary culprits. Always rule these out before blaming electrical components.
A: Never upgrade to a higher wattage unit. Replacing a factory spec component with a larger unit creates severe hazards. The appliance control board is rated for specific electrical currents. A larger unit will likely fry the control board and violate critical appliance safety compliance standards.


