 English
- All
- Product Name
- Product Keyword
- Product Model
- Product Summary
- Product Description
- Multi Field Search
EnglishViews: 0 Author: Site Editor Publish Time: 2026-06-12 Origin: Site


A washing machine that agitates but fails to spin disrupts household operations. You might immediately assume your appliance has suffered a catastrophic failure. This often leads to premature appliance replacement. While a dead Spin Motor is a common assumption, replacing it blindly is a mistake. Guessing without proper diagnostics wastes both time and capital. Far too many homeowners discard perfectly fixable machines.
We aim to provide a transparent, evidence-based framework for safely testing your appliance. You will learn how to test the spin motor of washing machine units accurately. We will teach you to interpret diagnostic data clearly. By following these steps, you can avoid unnecessary expenses. You will finally stop guessing and start making financially sound repair-or-replace decisions based on hard facts.
Process of Elimination: Before testing the motor, verify that cheaper, high-failure-rate components (like lid switches or drive belts) are not the actual root cause.
Data-Driven Diagnostics: A digital multimeter is mandatory for this evaluation; visual inspections alone cannot definitively rule out internal winding failures.
Safety First: Appliance capacitors store lethal charges. Proper discharging and disconnection protocols are non-negotiable before accessing the washing machine spin motor.
Decision Matrix: If the motor fails the continuity test, the decision to replace the motor versus the entire washing machine hinges on the appliance's age and overall condition.
You must frame the problem accurately before tearing your machine apart. Committing to complex labor without verifying assumptions is a common mistake. Homeowners frequently misdiagnose peripheral failures as motor deaths. This section helps you verify the actual symptoms. You must listen to the machine and observe its behavior carefully.
The sounds your machine makes tell a detailed story. A humming sound is very different from total silence. You can save hours of labor by mapping these symptoms correctly.
Motor humming but no movement: This indicates power is reaching the unit. The motor wants to turn but cannot. You might have a seized motor bearing. You could also have a failed start capacitor. Physical obstructions between the inner and outer tub also cause this hum.
Complete silence during spin cycle: Silence usually means zero voltage is reaching the motor. This points away from a dead motor. Instead, suspect the timer assembly or control board. A failed lid switch is another prime suspect. Do not buy a new motor if the machine is completely silent.
Professionals always start with the easiest, cheapest fixes. We call this the process of elimination. You should never disassemble the main drive system first. Check these three peripheral components before assuming the worst.
Lid Switch Assembly: This is the most common safety mechanism in top-loading machines. It intentionally cuts power to the spin cycle when the lid opens. These plastic switches break easily from repeated slamming. Check this switch for continuity before doing anything else.
Drive Belt & Couplers: Inspect the rubber belts for snapping, stretching, or severe wear. A motor might spin perfectly, but a broken belt transfers zero power to the drum. Direct-drive machines use rubber couplers. Inspect these couplers for shattered plastic or torn rubber.
Drain Pump: Your machine relies on water level sensors. If the tub does not drain completely, safety sensors prevent the spin cycle. A clogged drain pump mimics a dead motor. Clean the pump filter and check for trapped coins or lint.
Use the following comparison chart to cross-reference your specific symptoms. This quick guide will steer your troubleshooting in the right direction.
Observed Symptom | Most Likely Root Cause | Recommended First Action |
|---|---|---|
Motor hums loudly but drum stays still | Bad start capacitor or jammed tub | Test capacitor; check for clothing blockages |
Total silence when spin cycle should start | Broken lid switch or faulty timer | Test lid switch continuity |
Tub full of water, no spinning occurs | Clogged drain pump | Clear pump filter and drain hoses |
Motor turns easily by hand but trips breaker | Short circuit in motor windings | Perform ground fault test on motor |
Appliance repair carries genuine physical risks. You are dealing with high voltage, heavy machinery, and stored electrical charges. Establishing proper safety protocols is non-negotiable. Skipping these steps can lead to severe injury or electrical fires.
You must isolate the machine from all power sources. Turning off the control dial is entirely insufficient. Wall voltage still sits at the timer contacts. Unplug the unit directly from the wall receptacle. If the plug is inaccessible, flip the dedicated circuit breaker in your main electrical panel.
Appliance capacitors store lethal charges for days after power disconnection. A capacitor jump-starts the motor. Locating and safely discharging the motor capacitor is a critical risk mitigation step. Use a screwdriver with a heavily insulated handle. Touch the metal shaft simultaneously across the capacitor terminals. You might hear a loud pop. This confirms the stored energy has safely discharged.
You cannot diagnose electrical issues by looking at them. You need the right tools to extract hard data. Gather these tools before opening the machine cabinet.
Digital Multimeter: This is your primary diagnostic tool. Ensure it is capable of measuring Ohms/Resistance accurately.
Nut Drivers and Socket Wrenches: Different brands use specific fasteners. A standard 1/4-inch and 5/16-inch nut driver will handle most American brands. You may need metric sockets for European models.
Safety Gear: Wear insulated electrical gloves. Safety glasses protect your eyes from sudden sparks during capacitor discharge.
Needle-Nose Pliers: These help remove tight wiring harness connectors without damaging the delicate wire crimps.
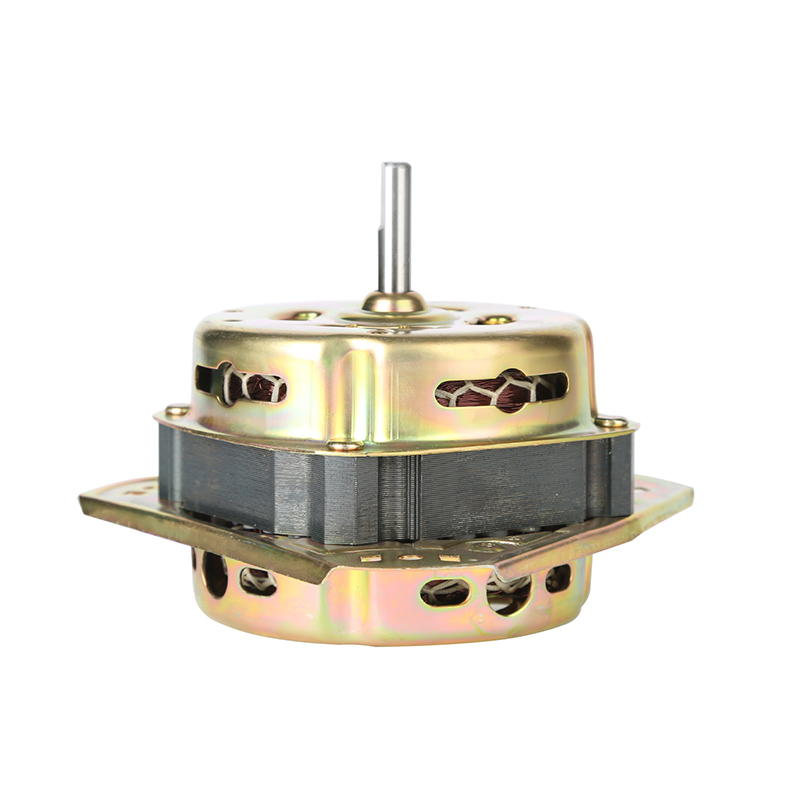
Motor placement varies heavily depending on the machine type. Front-load washing machines generally house the motor at the bottom rear. You access it by removing the back metal panel. Top-load machines usually mount the motor directly to the bottom of the outer tub. You may need to tilt the machine backward against a wall. Some top-loaders require removing the entire front cabinet assembly. Always secure a tilted machine so it does not fall on you.
This is the core solution approach. We will walk through the exact steps to evaluate the internal health of the motor. Follow this step-by-step technical guide carefully. Do not rush the diagnostic phase.
Start with a basic sensory evaluation before relying on the multimeter. Disconnect the plastic wiring harness from the motor terminals. Pull on the plastic plug housing, not the wires themselves. Inspect the plastic connector for melted spots or black soot.
Next, manually rotate the motor shaft with your hand. The shaft should spin smoothly with steady resistance. Look for physical grinding noises. Bearing failure creates a rough, gravel-like feel when you spin the shaft. Sniff the motor stator carefully. Burn marks or an acrid, burnt-plastic odor strongly suggest overheated windings. If the shaft will not turn at all, the bearings have seized.
You must measure the electrical resistance of the copper windings. Set your digital multimeter to the lowest Ohms (Rx1) setting. Touch your two probes together to ensure the meter reads zero. This confirms your tool works correctly.
Testing the Windings: A standard washing machine spin motor has three main terminals. These are the Start, Run, and Common terminals. Refer to your manufacturer's specific wiring diagram. This diagram is often tucked inside the control panel console.
Probe between the Common terminal and the Start terminal. Next, probe between the Common terminal and the Run terminal. Finally, probe across the Start and Run terminals.
Expected Outcome: Good winding readings typically fall between 1 to 10 Ohms. The exact number varies by model. If you see infinite resistance (often displayed as "OL" or "1" on the far left), you have an open winding. The copper wire inside has snapped. If you read exactly zero Ohms, the winding has fused together. Both scenarios mean the motor is dead.
A ground fault is a critical safety hazard. It means live electricity is bleeding into the metal frame of your washing machine. This test ensures the internal wire insulation remains intact.
Keep one multimeter probe firmly touching a motor terminal. Touch the second probe directly to the bare metal motor casing. Scratch the probe slightly against the metal to bypass any clear coat or rust.
Expected Outcome: The multimeter should read infinite resistance (OL). This indicates total electrical isolation between the wires and the casing. Any numeric reading means an internal short to ground exists. A grounded motor is a definitive failure and poses a severe shock hazard. It must be discarded immediately.
Once you gather the multimeter data, you face a decision. You must evaluate the bottom-of-funnel dimensions. This section breaks down the ROI analysis and shortlisting logic. You want to allocate your funds logically.
If your shaft spins freely and your Ohms readings are normal, pause your repair. The motor passed the ground fault test as well.
Action: Do not buy a new spin motor. You will waste money.
Next Steps: Redirect your troubleshooting efforts elsewhere. You must look up the diagnostic sequence for the motor control board. Check the mechanical timer assembly. Investigate the transmission and clutch. The motor simply does as it is told. If it receives no command, it will not spin.
If your multimeter showed an open winding, a short, or a ground fault, the diagnosis is complete. You cannot repair internal windings at home.
Action: The spin motor must be replaced. Your current component is permanently dead.
You must weigh the costs carefully before ordering parts. You need to look at part pricing, labor variables, and appliance age.
Part Costs: The average cost of an OEM (Original Equipment Manufacturer) motor ranges significantly. OEM parts guarantee exact fitment and reliable performance. Aftermarket alternatives cost less initially. However, aftermarket parts carry higher failure risks and shorter lifespans. We highly recommend sticking to OEM components for main drive systems.
Labor Variables: Hiring a professional technician incurs diagnostic fees and hourly rates. DIY replacement easily saves you $150 to $300 in technician fees. You only pay for the part itself. However, DIY work carries no warranty on labor. If you install it incorrectly, you bear the total risk. Ensure you feel confident following wiring diagrams before choosing the DIY route.
The 50% Rule: Industry professionals rely on a simple mathematical formula. Determine the current age of your washing machine. Next, calculate the total repair cost. This includes the new motor, shipping, a new capacitor, and professional labor if applicable.
If the appliance is over 7 years old and the total repair cost exceeds 50% of a brand-new unit's price, full replacement is the mathematically sound choice. Older machines will soon experience transmission or control board failures. Pumping heavy funds into an aging frame rarely yields a positive return. If the machine is only 3 years old, replacing the motor is highly recommended.
Checking the spin motor of a washing machine is a definitive way to stop guessing. You can take control of your appliance maintenance. Resolving your laundry downtime requires logic, not panic. We have outlined the clear symptoms of motor failure versus switch failure.
By ruling out simple faults first, you save valuable time. Utilizing a multimeter gives you hard data rather than vague assumptions. Weighing the replacement ROI protects your wallet. Homeowners can absolutely make informed, cost-effective decisions without relying on predatory repair quotes.
Your next step is clear. Locate the metal data plate on your machine cabinet. Verify your exact washing machine model number. Use this specific number to source the correct OEM replacement component. If the diagnostic steps feel overwhelming, reach out to a vetted appliance professional in your area. Armed with this knowledge, you can speak confidently with any technician.
A: Yes. If the motor operates during agitation but not the spin cycle, the motor itself is likely fine. The issue usually lies in the transmission, clutch assembly, or a directional control switch. The motor merely provides the turning force; the transmission dictates the resulting action.
A: Parts typically range from $100 to $250 depending on the brand (e.g., Whirlpool, LG, Samsung). Direct-drive motors tend to cost more than belt-driven models. Professional labor adds an additional $150 to $200. Doing the replacement yourself saves significant money on labor.
A: No reliable electrical test can be performed without a multimeter. Visual inspections can only confirm obvious catastrophic failures like burnt wiring or seized bearings. Internal copper winding breaks or shorts to ground are entirely invisible. A digital multimeter is absolutely required for an accurate diagnosis.


